This story is part of a content partnership and media exchange between Neocha and VSCO. VSCO’s membership program is designed to help you reach your creative potential. Take the next step in your creative journey by starting your free 7-day trial today and gain access to the complete VSCO preset library, the newest editing tools, and inspiring educational content.
HSL gives you full control of the individual colors in your images. Together, the Hue, Saturation, and Lightness sliders can be used to create both dramatic and nuanced effects. By controlling colored lights in a studio, the three approaches below help illustrate the basics of the three sliders. Try making a simple studio setup with your own lights, or experiment with some of these editing techniques on an existing image that has a few dominant colors.
本篇文章来自新茶媒体合作伙伴 VSCO 的内容交换。VSCO 是一个专门帮助摄影爱好者发挥创造潜力的会员项目。现在就开启你的 7 天免费试用,获取完整的预设滤镜,以及新的编辑工具、视频编辑和教程内容。
HSL 工具可以让你掌控图像中的每一种颜色。使用 H—Hue(色调)、S—Saturation(饱和度)和 L—Lightness(亮度)滑块,有利于创建既戏剧化又富含细节的视觉效果。以下我们将通过在工作室里设置彩色灯光来说明关于 HSL 的基础知识。你也可以试试使用自己的灯光进行简单的实验,或者在一张没有太多主色的照片中尝试这些编辑技巧。
Use Hue to shift colors
使用色调滑块,偏移色彩
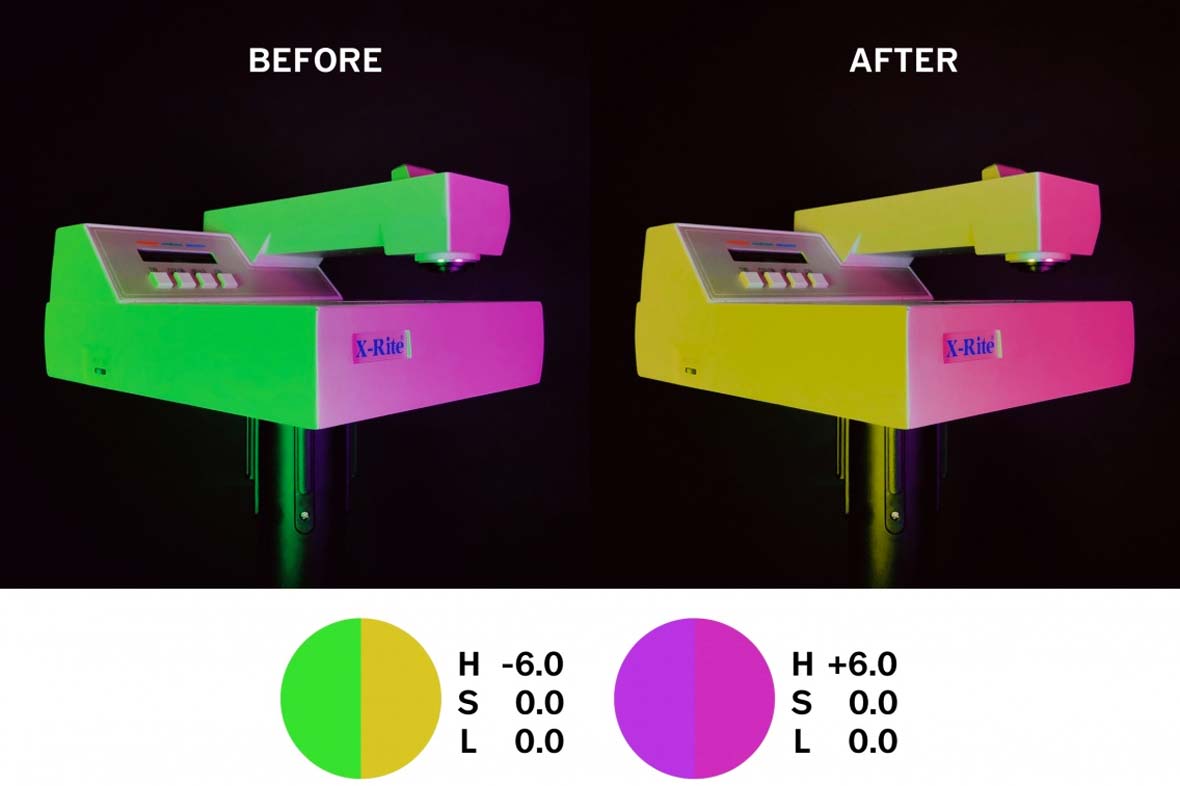
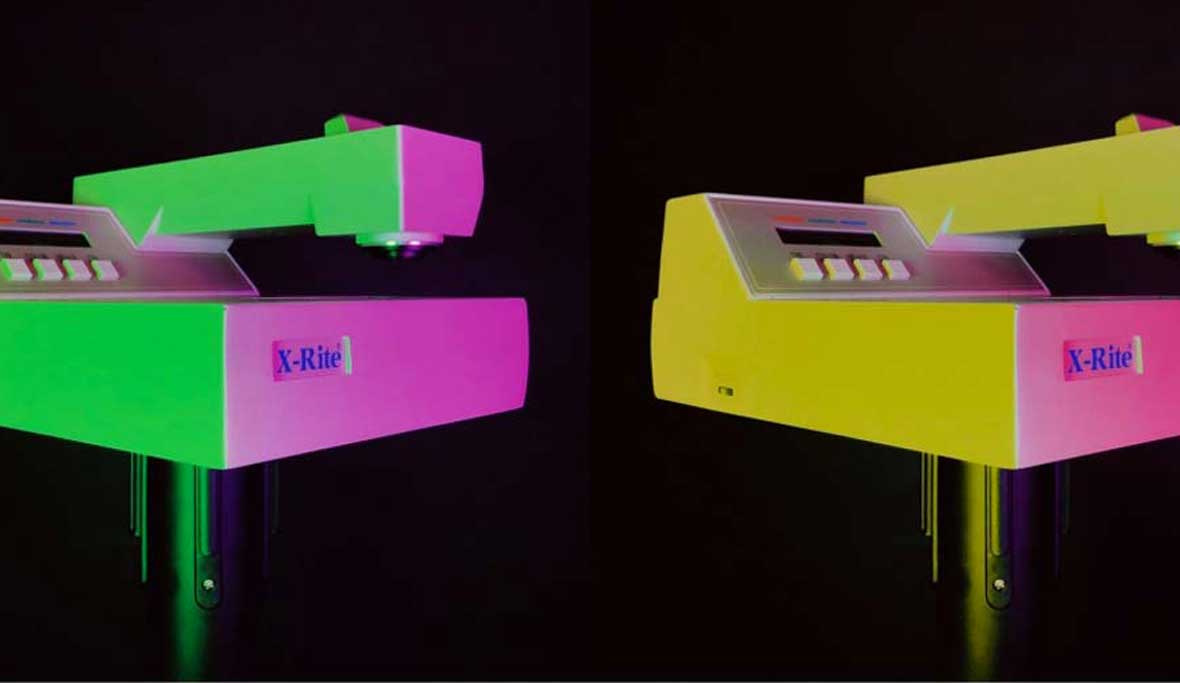
Green and purple are the dominant colors in the original image on the left. By selecting the green icon inside the HSL tool, we can shift the hue of all the green parts of the image. Sliding hue to -6.0 gradually shifts the color from green to its neighbor on the color wheel, yellow. A move in the opposite direction would have shifted the green toward blue. By shifting the hue of the purple region in the image, a more subtle change toward pink is apparent. Use the hue sliders to experiment with creating targeted color shifts.
绿色和紫色是原始图像(左侧)中的主色。通过选择 HSL 工具内的绿色图标,我们可以调整图像中所有绿色部分的色调。将色调滑动到 -6.0,颜色逐渐从绿色转移到色环上的相邻颜色——黄色。向反方向移动,则会使绿色向蓝色移动。通过改变图像中紫色区域的色调,可以看到向粉红色的微妙变化更明显了。使用色相滑块来创建更有针对性的色彩偏移。
Use Saturation to isolate colors
使用饱和度滑块,突出颜色
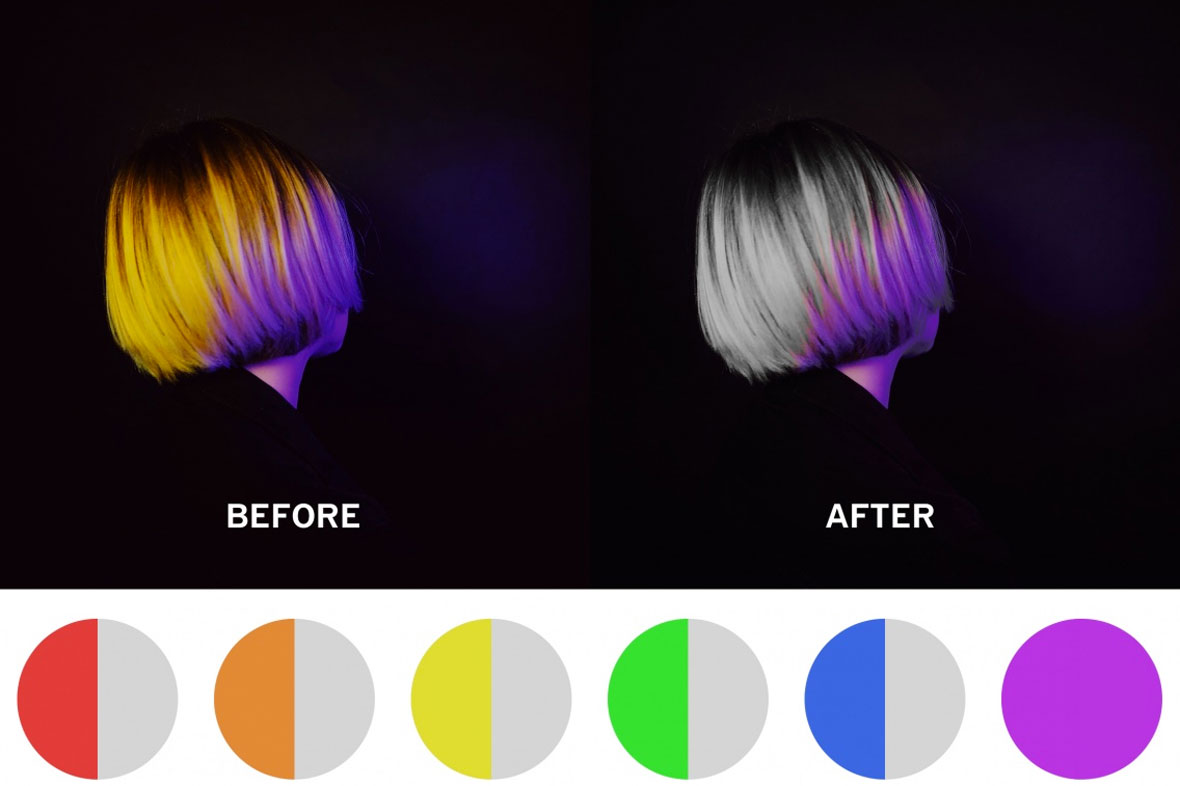
Saturation is most easily thought of as color intensity. Increasing saturation enhances the color by making it stronger and more vibrant. Decreasing saturation removes color until it ultimately becomes a shade of gray, with no color at all. Taking this to the extreme, HSL allows you to completely remove some colors from a photo, while maintaining, or even boosting, others. In this example, all colors exempt purple were desaturated to -6.0, turning the whole image black and white exempt for the purple regions, which remained saturated.
饱和度常常被视作颜色强度,增加饱和度可以增强颜色,让照片更强烈、更有活力。反之,减少饱和度会消除颜色,直到它最终变成一块丧失色彩的灰色阴影。将此情况发挥到极致,HSL 工具让你可以从照片中完全删除某些颜色,同时保有、甚至是提升其他颜色。在这个例子中,所有非紫色的颜色都被去饱和度到了 -6.0,变为黑白,只有紫色区域保持饱和。
Use Lightness to adjust tones
使用亮度滑块,调整明暗
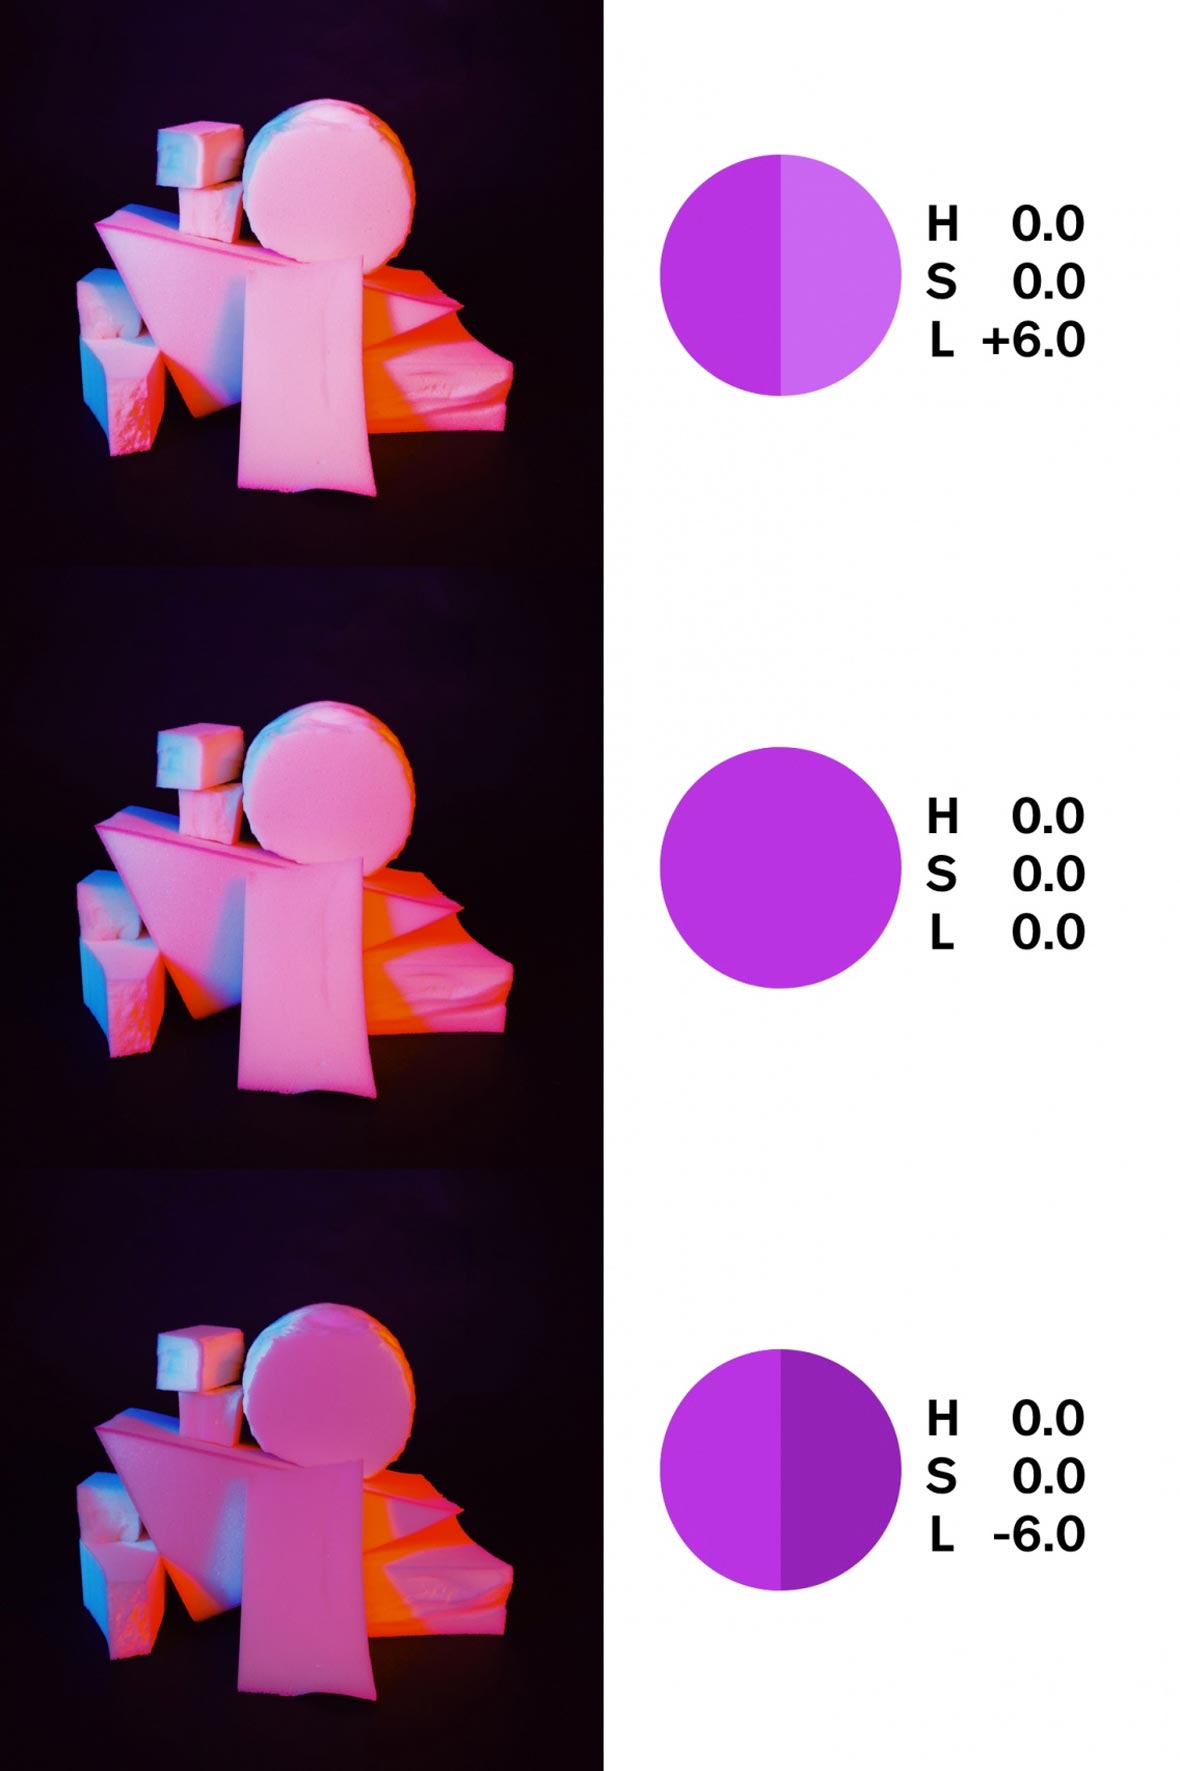
The lightness slider controls how bright or how dark a particular color appears, without drastically shifting the color itself. Sliding up to +6.0 will lighten the color’s tone, while moving down to -6.0 will darken it, creating a deeper tonality. This example shows how lightness can be gradually shifted from light to dark
亮度滑块控制特定颜色的亮度或暗度,并不会显着地改变颜色本身。滑动到 +6.0 会增亮颜色,而向下移动到 -6.0 会使颜色变暗,从而产生更深的色调。图中的例子显示了亮度滑块如何让图像逐渐从亮到暗移动。

